Support Type-X™ EVO 8.5 " and 7 " LED driving lights
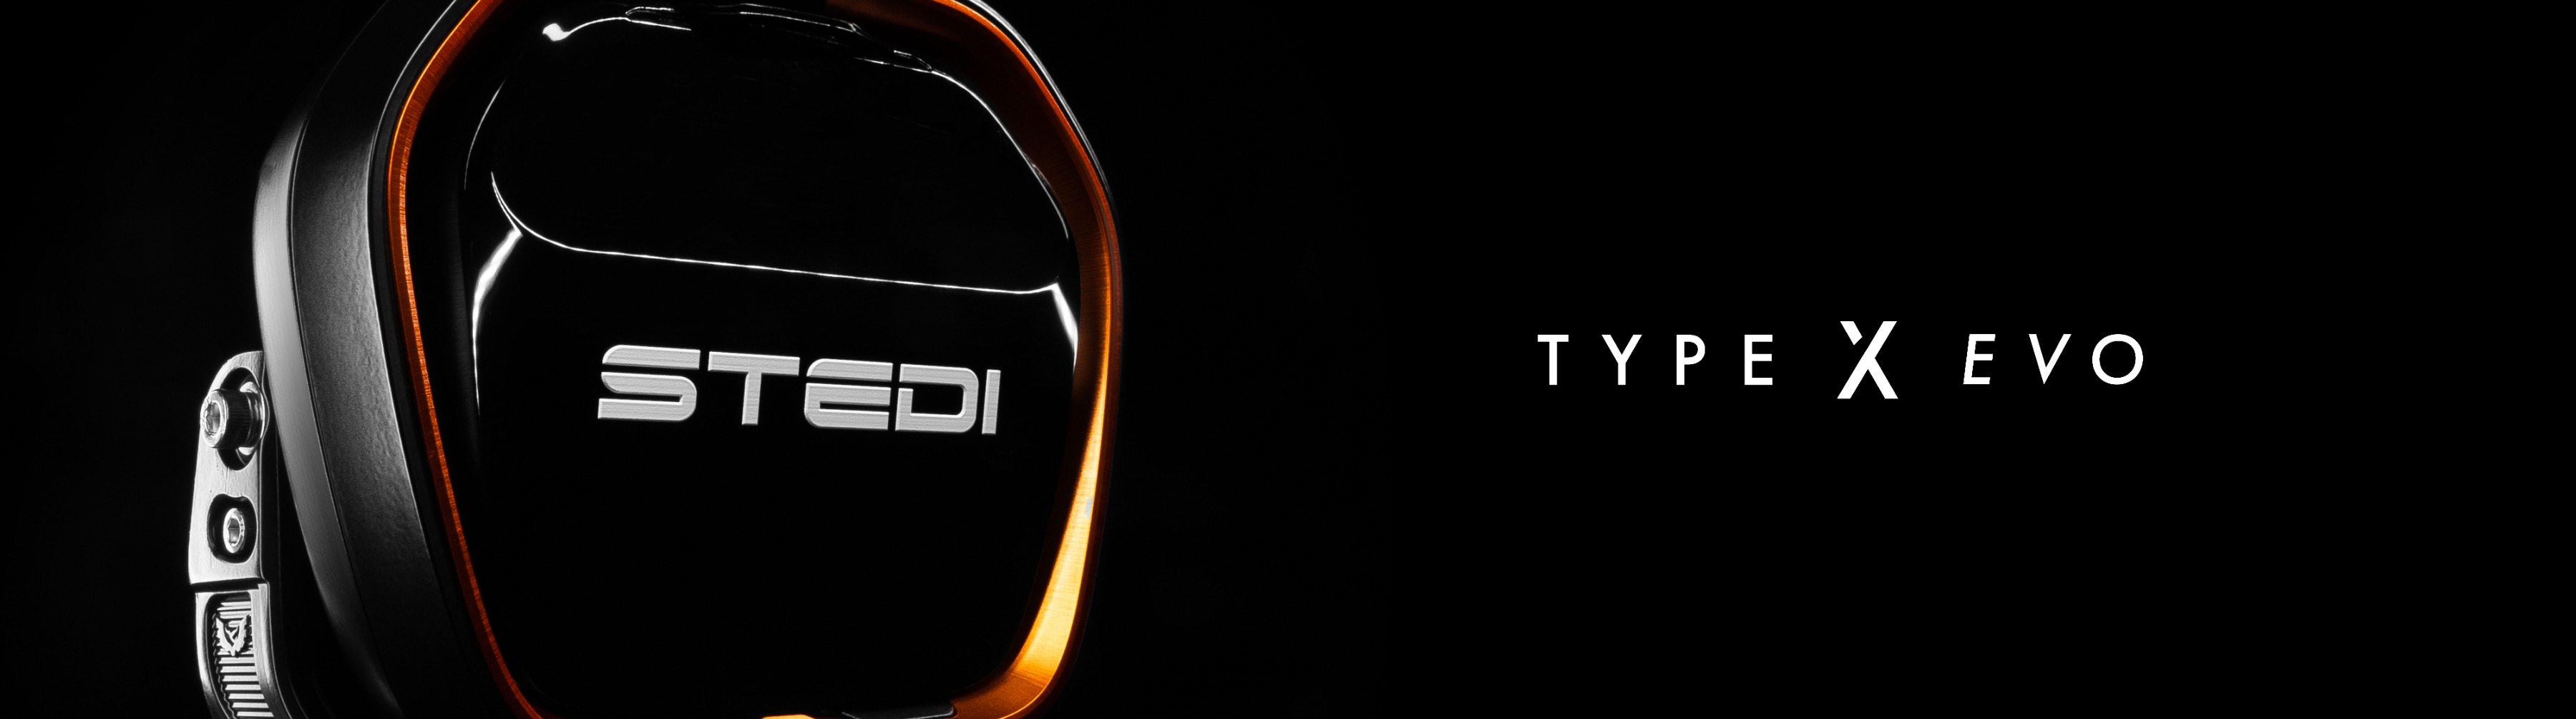
NOTE: The following installation instructions apply to both our Type-X™ EVO 8.5" and 7" driving lights.
IMPORTANT NOTES:
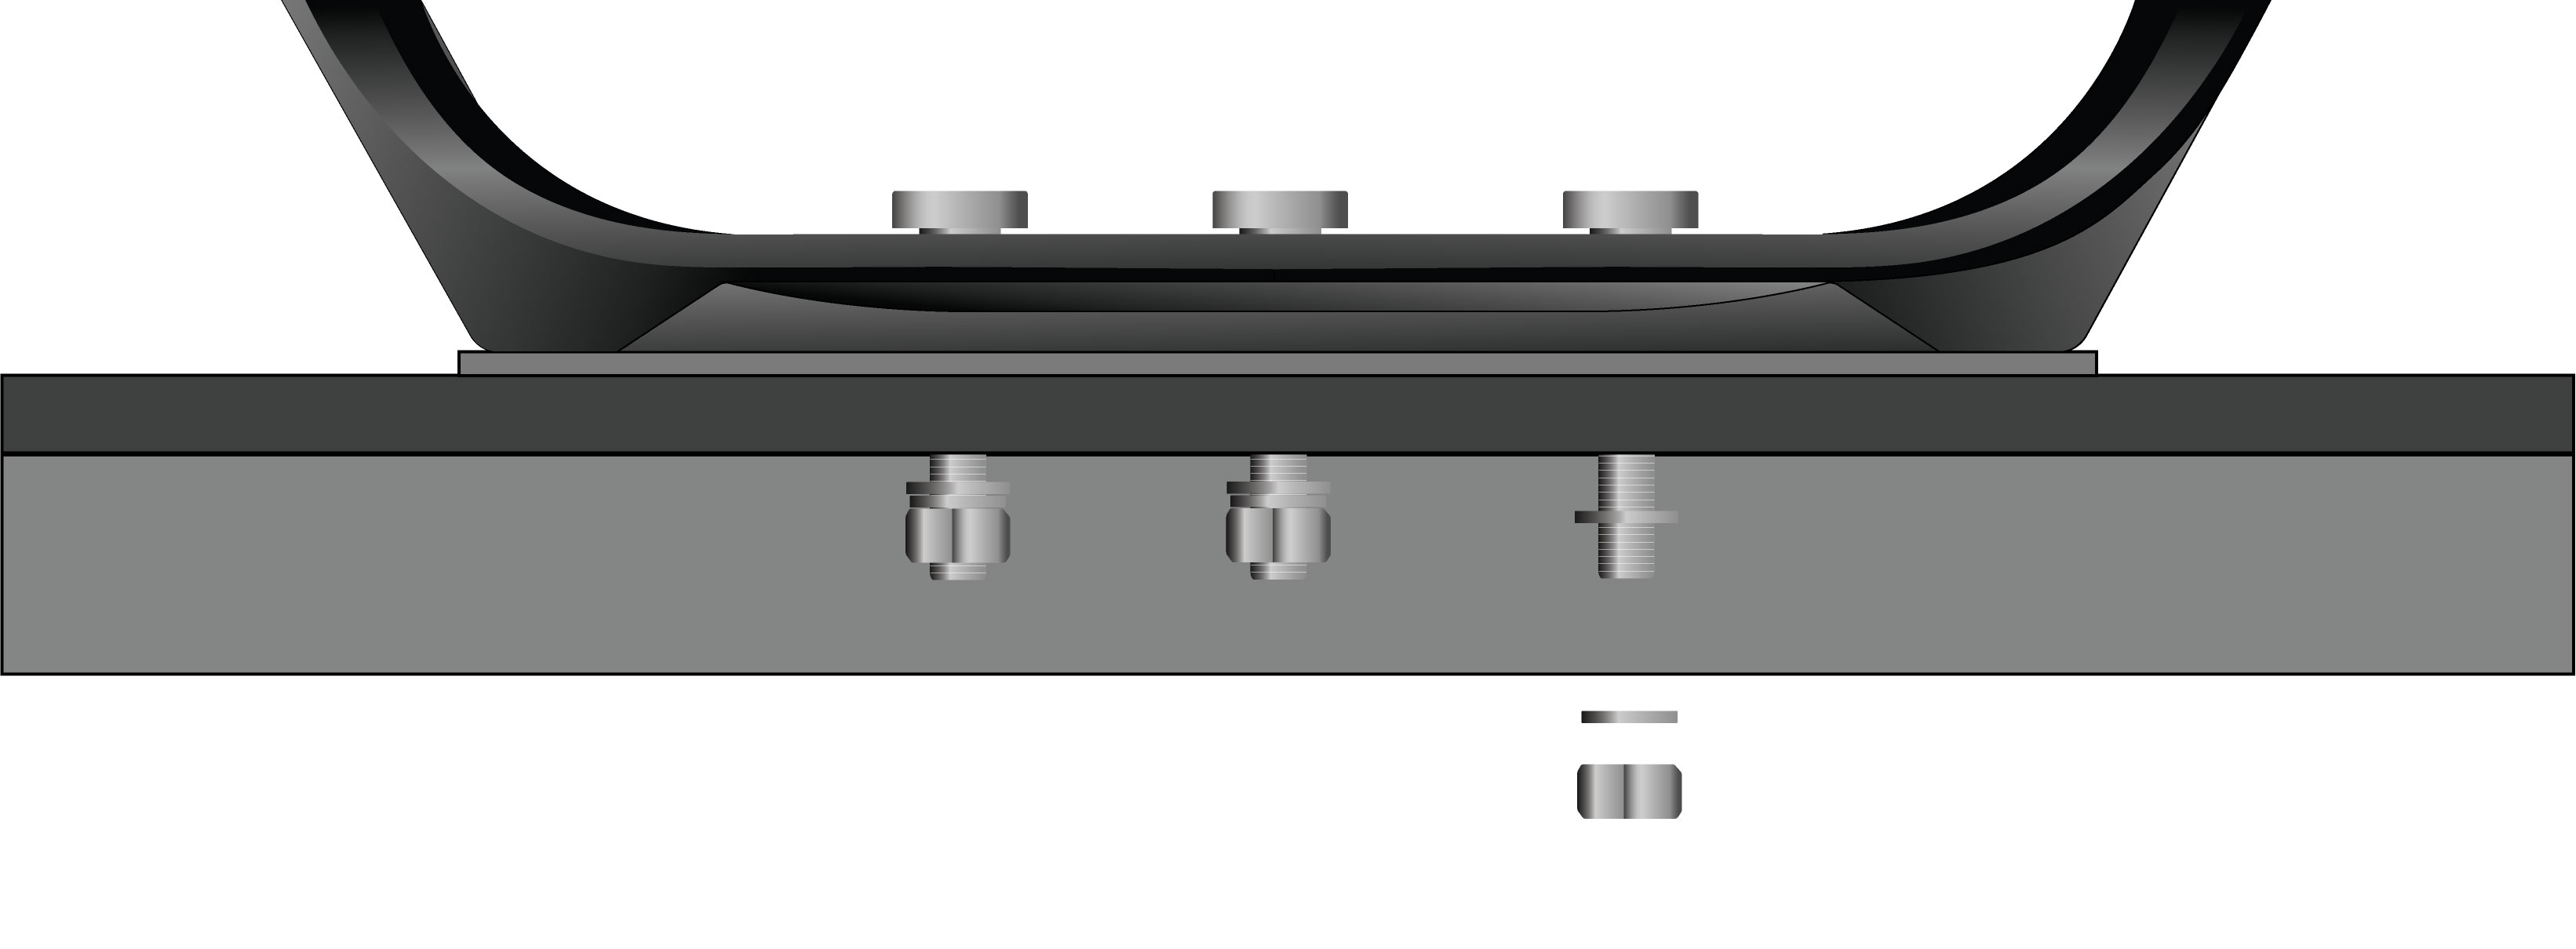
- All three M10 bolts must be used to mount the base of the U-Bracket to your vehicle. We highly recommend using all the supplied hardware for the correct fitment.
- Before fitting stainless steel hardware, we recommend applying a small amount of anti-seize to the threads of any mounting bolts.
MOUNTING HARDWARE
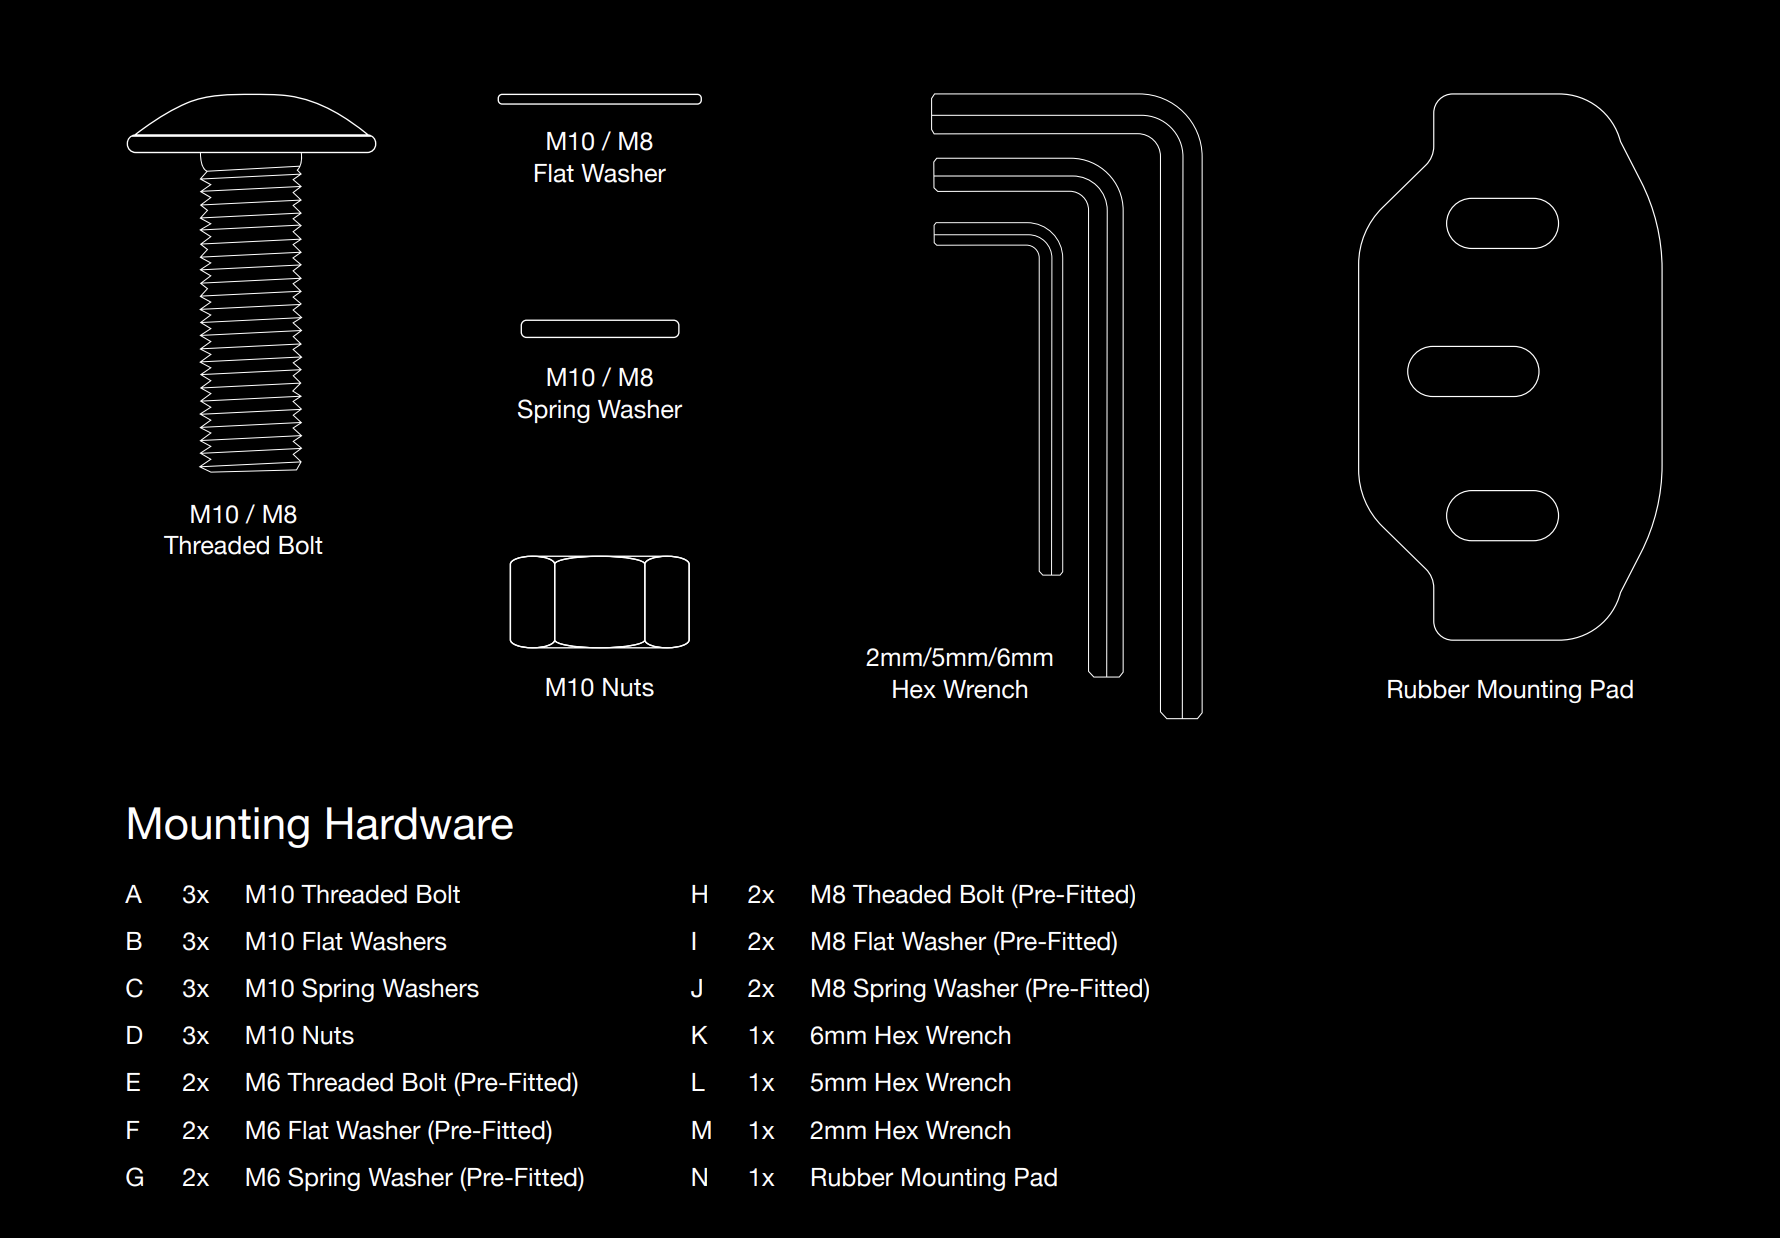
INSTALLATION
See the diagram below for installation details.
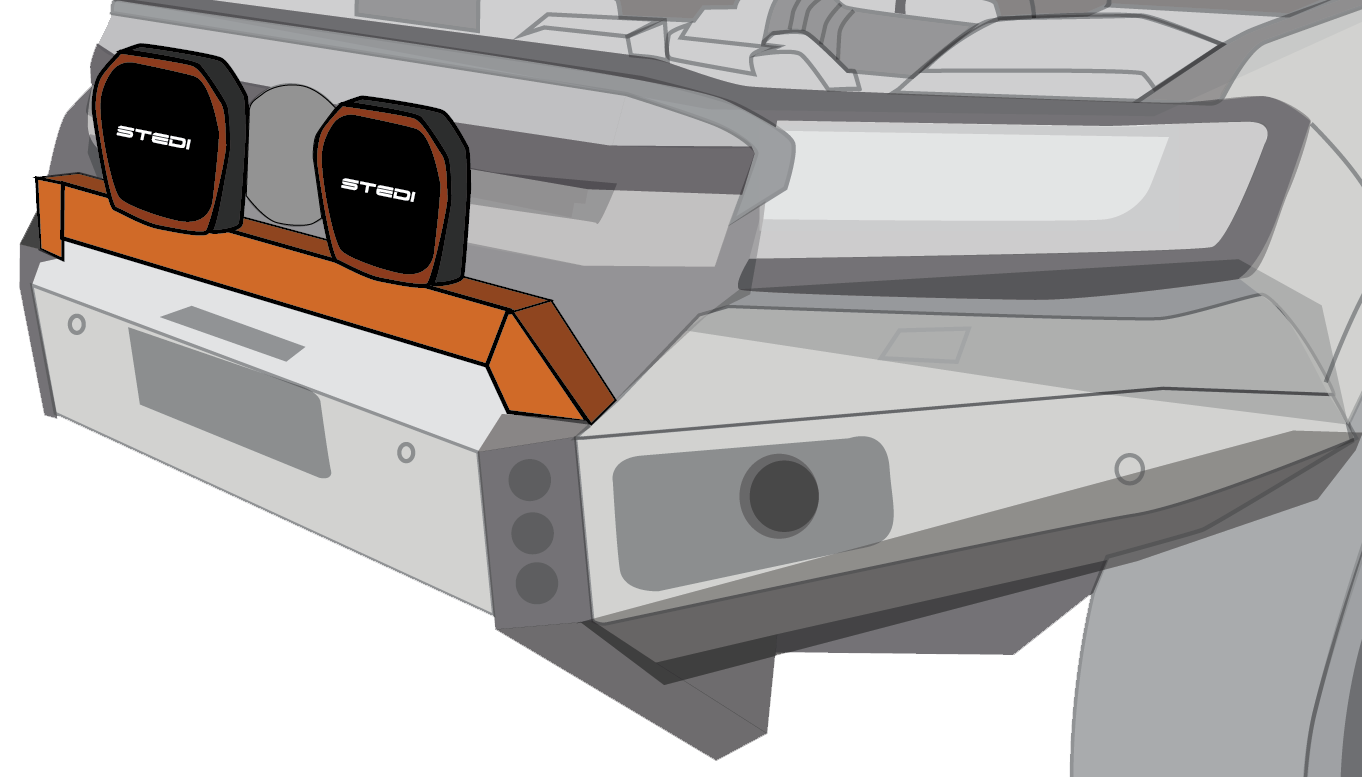
Begin by setting the light in the desired mounting position on the vehicle and roughly angling the light within the bracket. Due to the shape of the lens, it’s best to use the outer bezel as a vertical reference as to where the light will project. Keep in mind that you will need to venture out at night along a straight flat road to properly align the light.
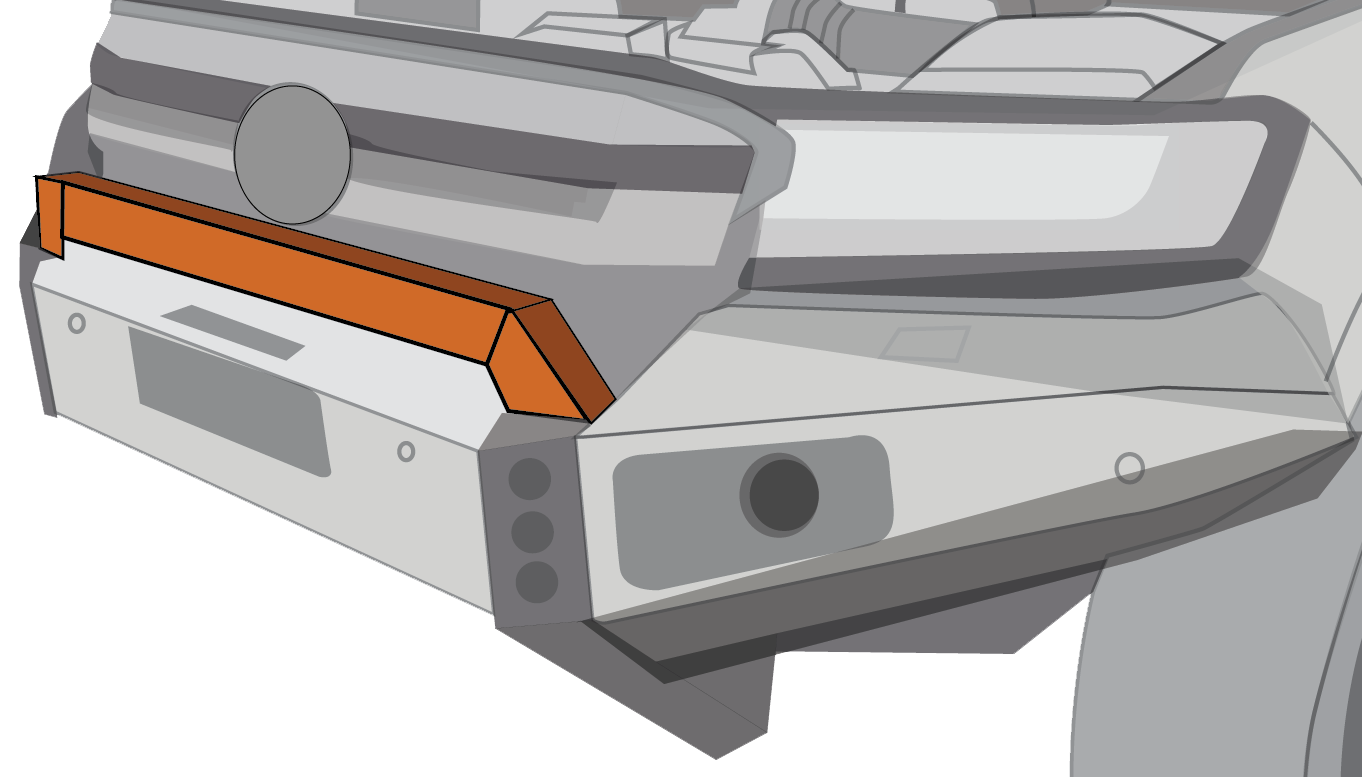
Think carefully about the mounting position of your light, as the base bracket holes will not suit all bull bar variants.
Depending on the install position and the available room to work with, some users may want to tighten the position while access to the bolts is still accessible. However, before you lock in the position, drop in the required number of M10 bolts through the base of the bracket because certain angles will cut off access to these holes.
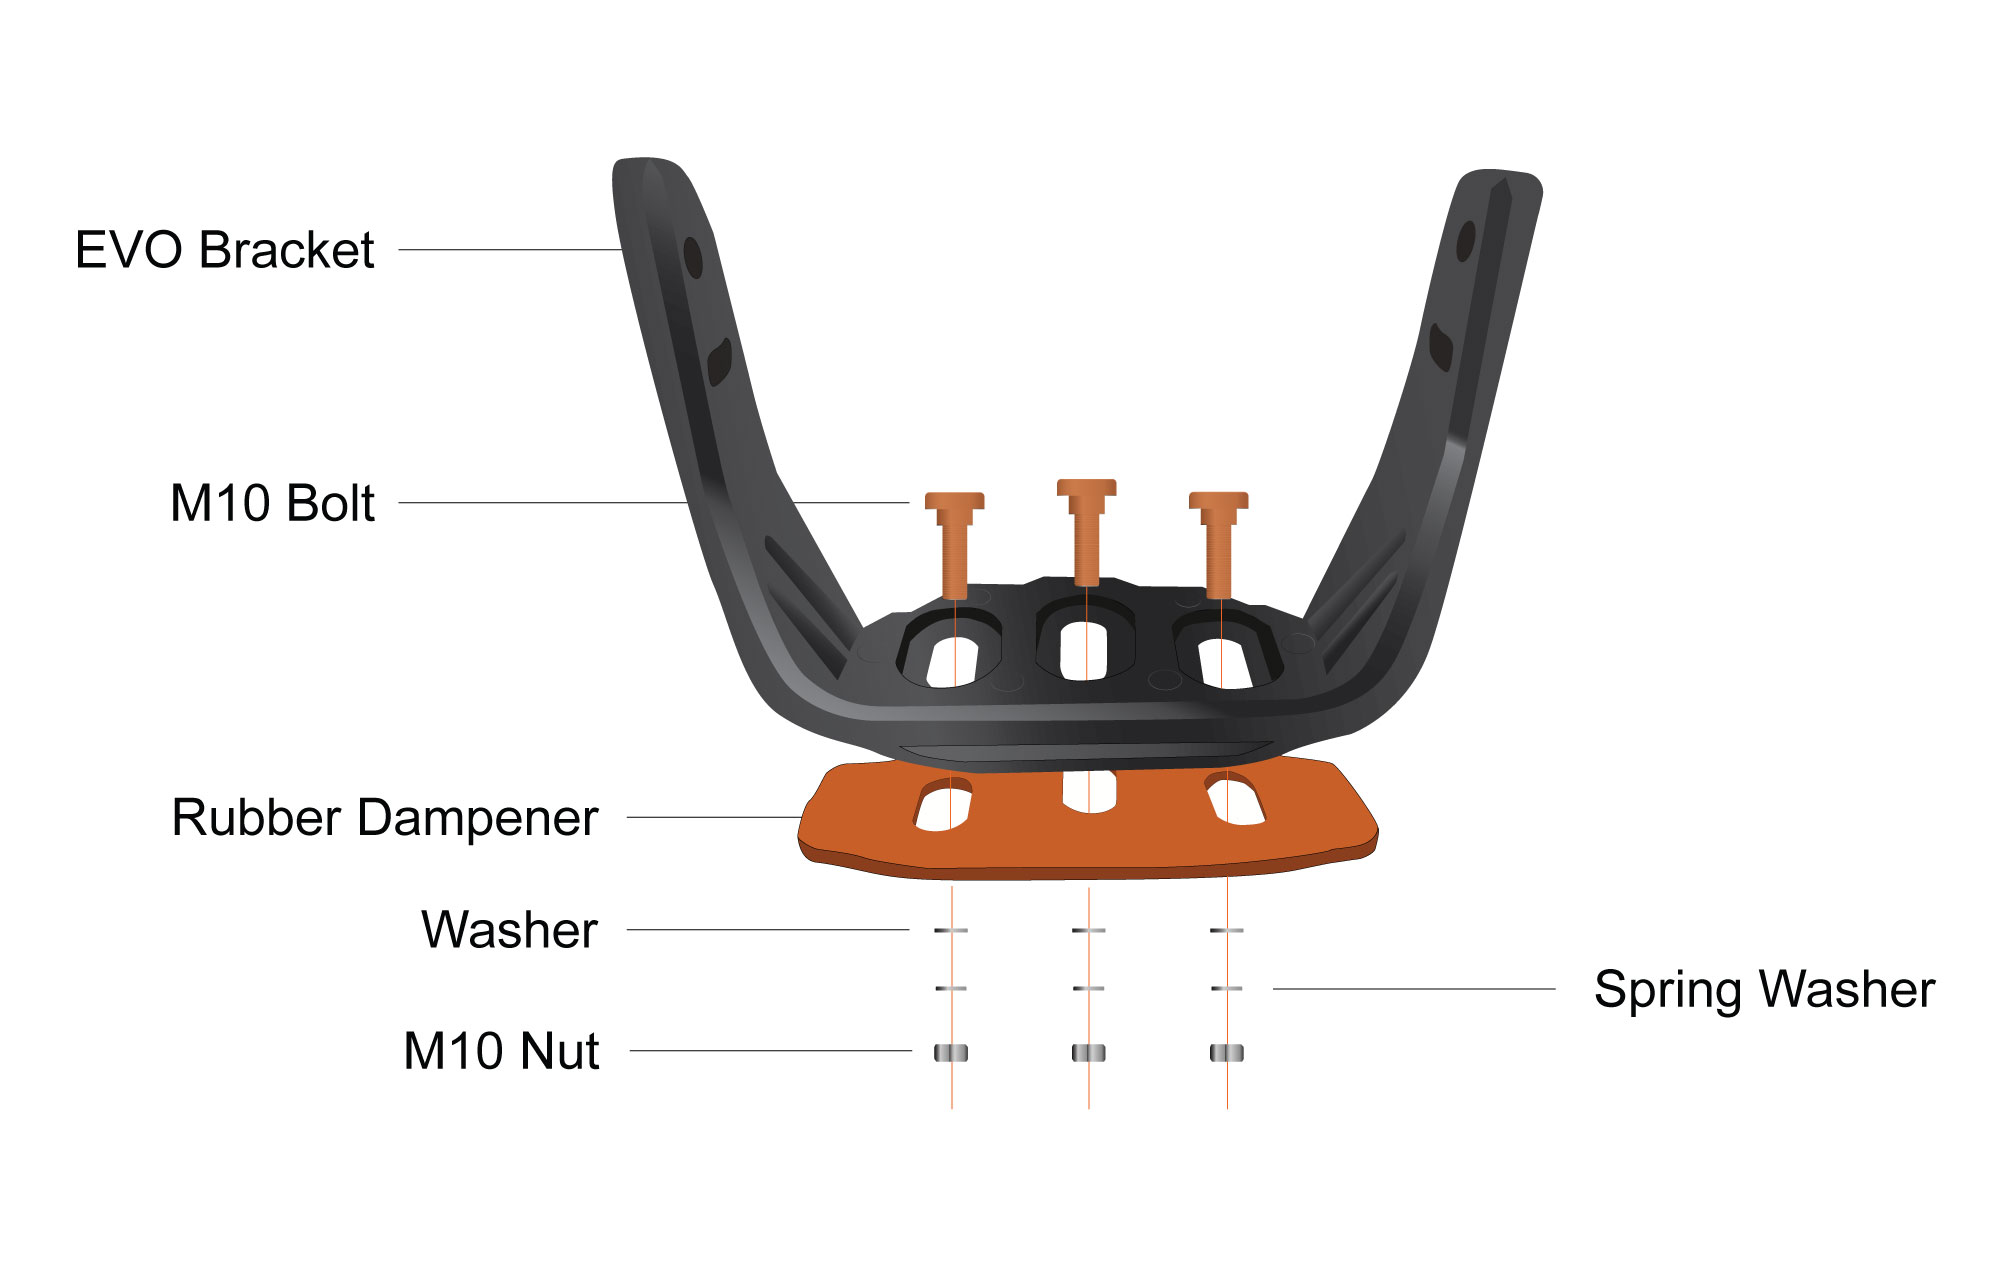
Put the light with the rubber dampener underneath the lights bracket into position, dropping the nuts through and into your mounting platform. This next step is a little tricky: you need to slip the washer, spring washer, and nut onto these bolts and secure tightly.
When mounting to the desired application, the order of the hardware is as follows: bolt > bracket > rubber dampener > mounting platform > washer > nut.
When adjusting the angle of the lights, make sure to have the bolts loose enough so that they can be tilted with little force and hold their position, but not so loose that the light swings freely. Once you find the ideal position, tighten all bolts firmly. If you’re using the anti-theft kit, refer to the anti-theft diagram below for installation.
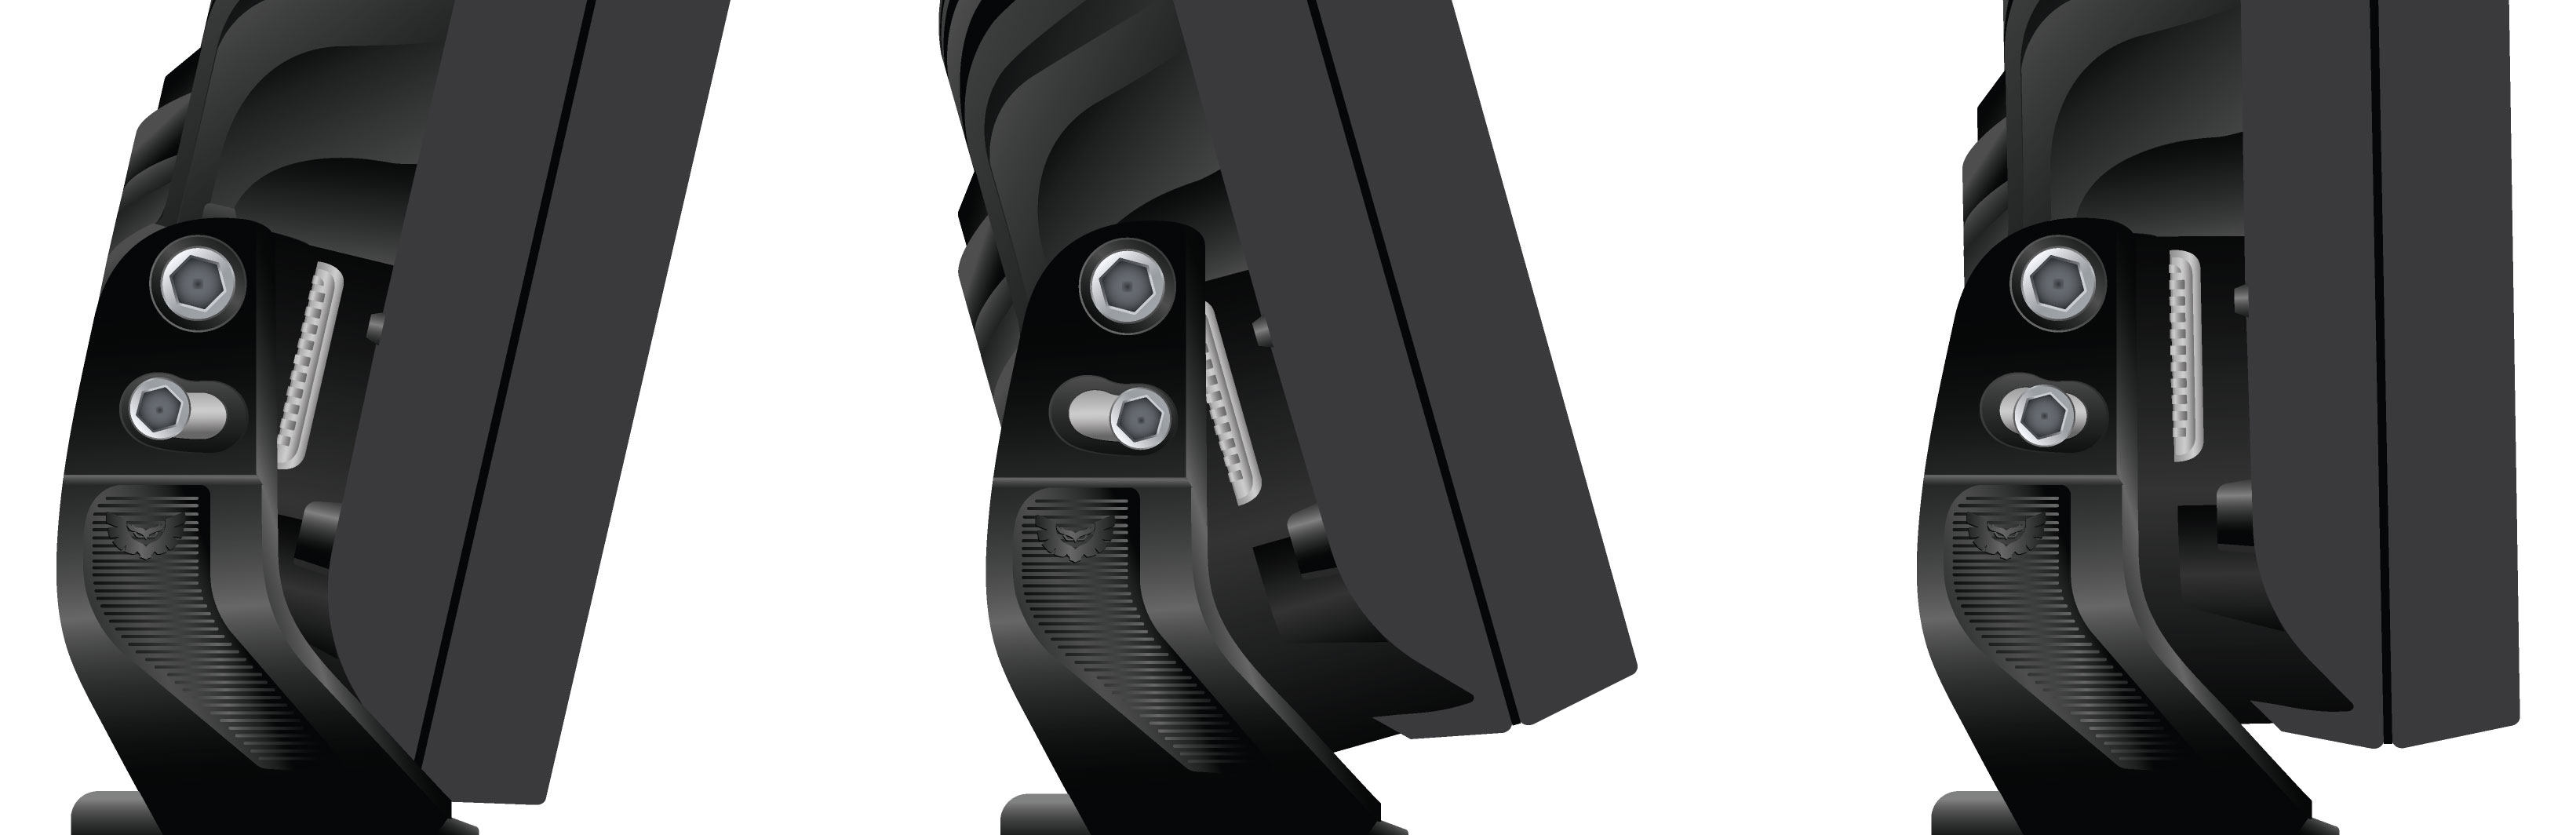
Type X™ EVO anti-theft kit installation
For customers that opted for the additional anti-theft kit, this is best swapped onto the light before continuing with the installation process.
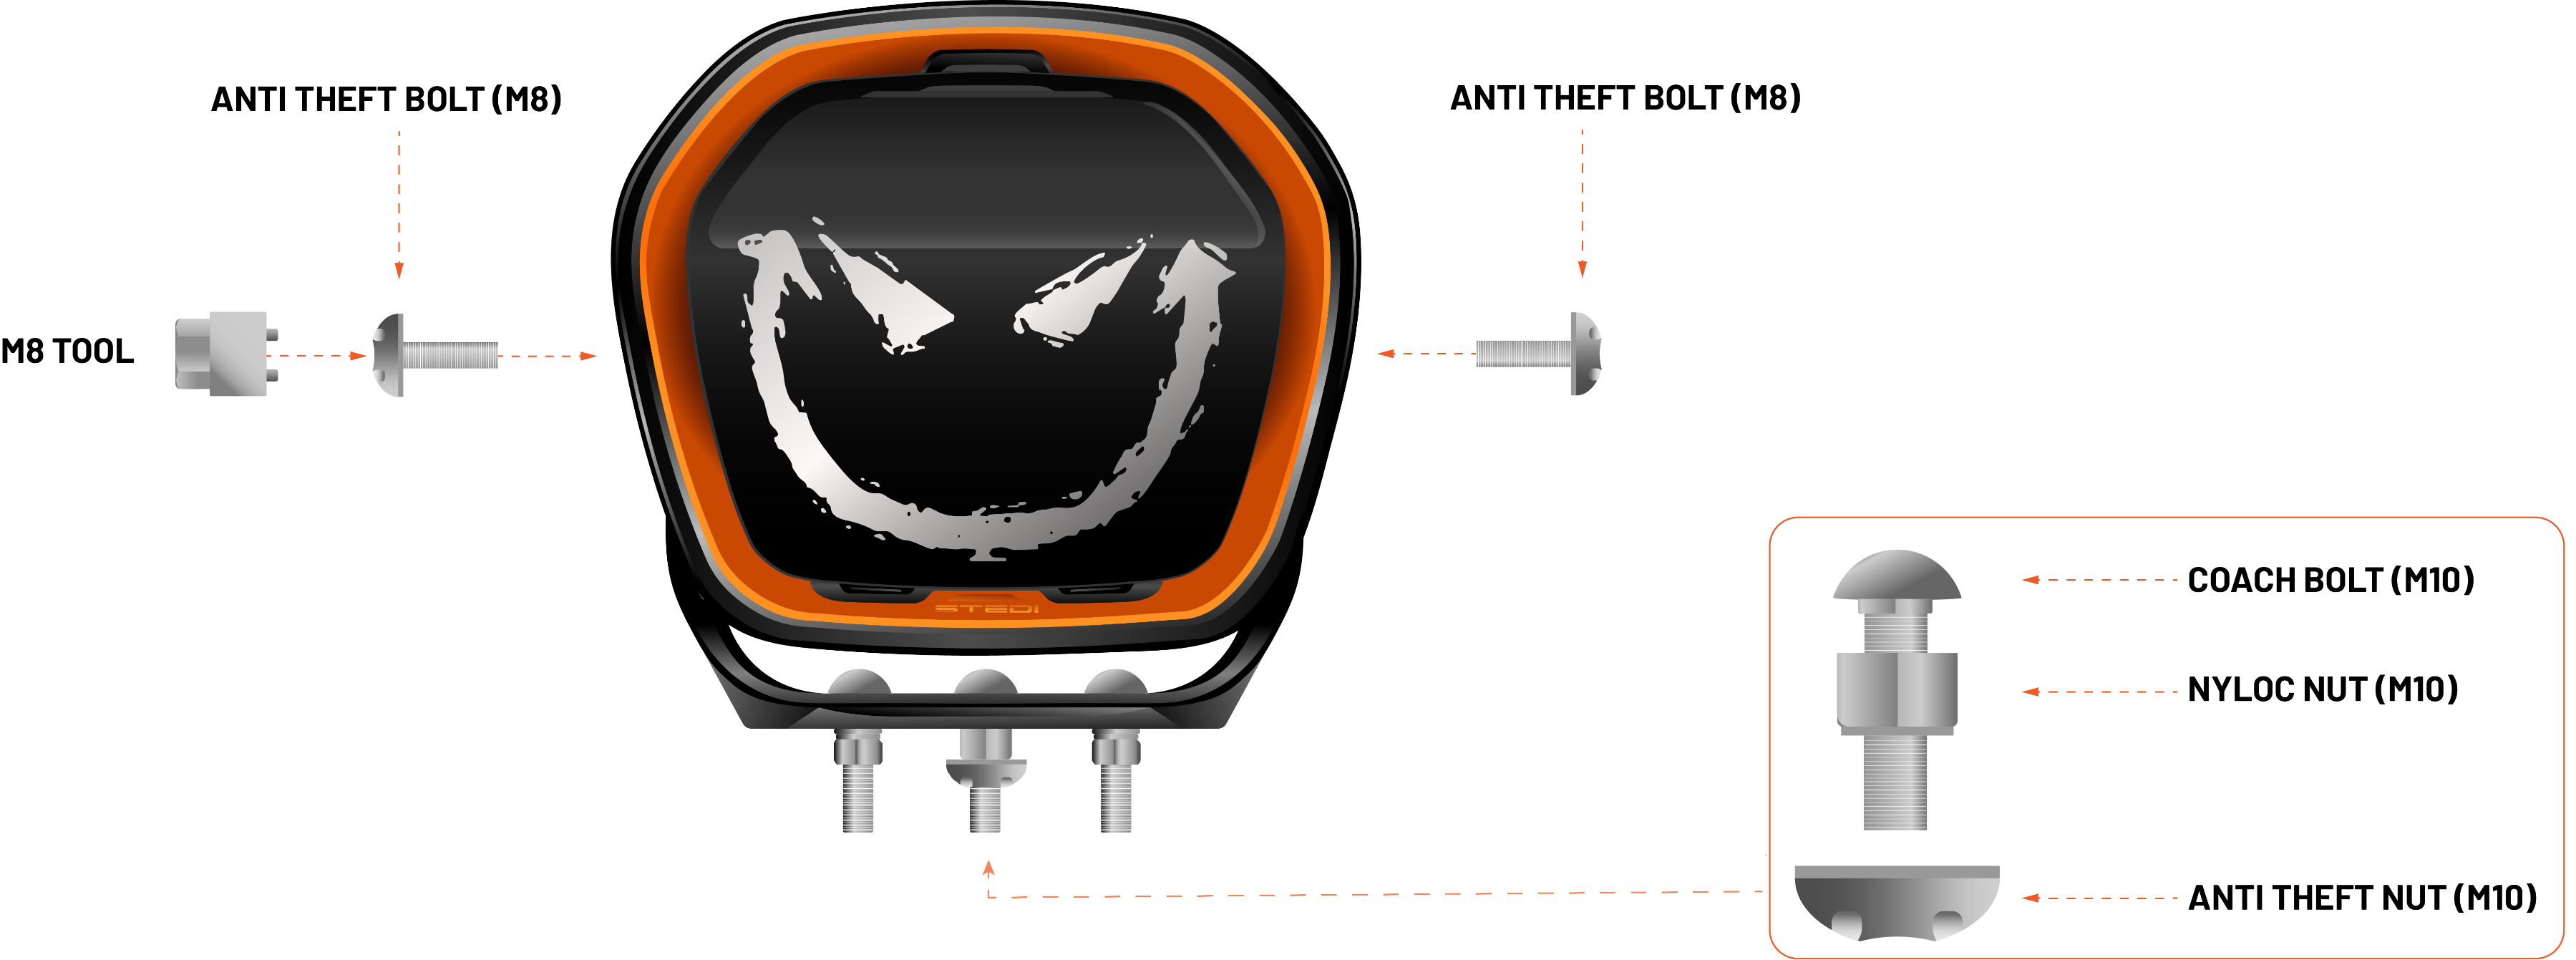
The anti-theft kit consists of the following:
- 1 x M10 nut security key
- 1 x M8 bolt security key
- 4 x 8 mm bolts (long) – Used to secure the brackets to the sides of the Type X Evo (fitted to the adjustment bolt position)
- 2 x 10 mm nuts – Used to secure the bracket to the vehicle in conjunction with the included shank bolt
Type X™ EVO cover installation
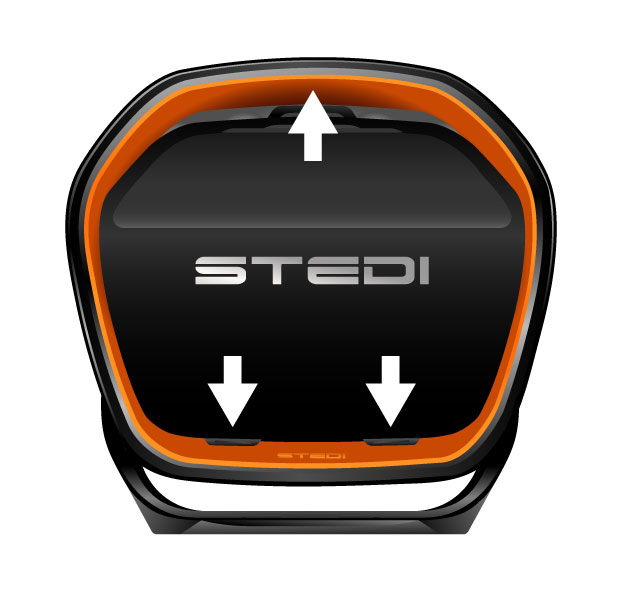
STEDI™ has designed the covers to be firm fitting. The following instructions explain the correct way to install the covers. Incorrect fitting may cause damage. Start by aligning the tabs on the bottom of the cover with the respective locators in the light housing. Once these are in place, press firmly down on the top of the cover until it snaps into place. To remove the cover, simply place your thumb on the top tab, push down on the tab, and pull out towards you.
OPTIONAL ACCESSORIES
NOTE: The following accessories are not cross compatible between the Type-X™ EVO 8.5” and 7” driving light. Please make sure you check compatibility before purchasing.
ANTI-THEFT:
For those wanting that little bit of extra protection, we offer a comprehensive anti-theft kit for peace of mind, featuring security keyed nuts and bolts to complicate things for any potential thieves.
BLACKOUT / FILTER COVERS:
Our initial launch will include the standard blackout covers, such as the standard STEDI™ and infamous Smiley, which are required in countries with strict road regulations surrounding auxiliary driving lights. Filter covers are also available in amber, green, and blue, which alter the light output colour temperature to assist with visibility in different driving conditions.
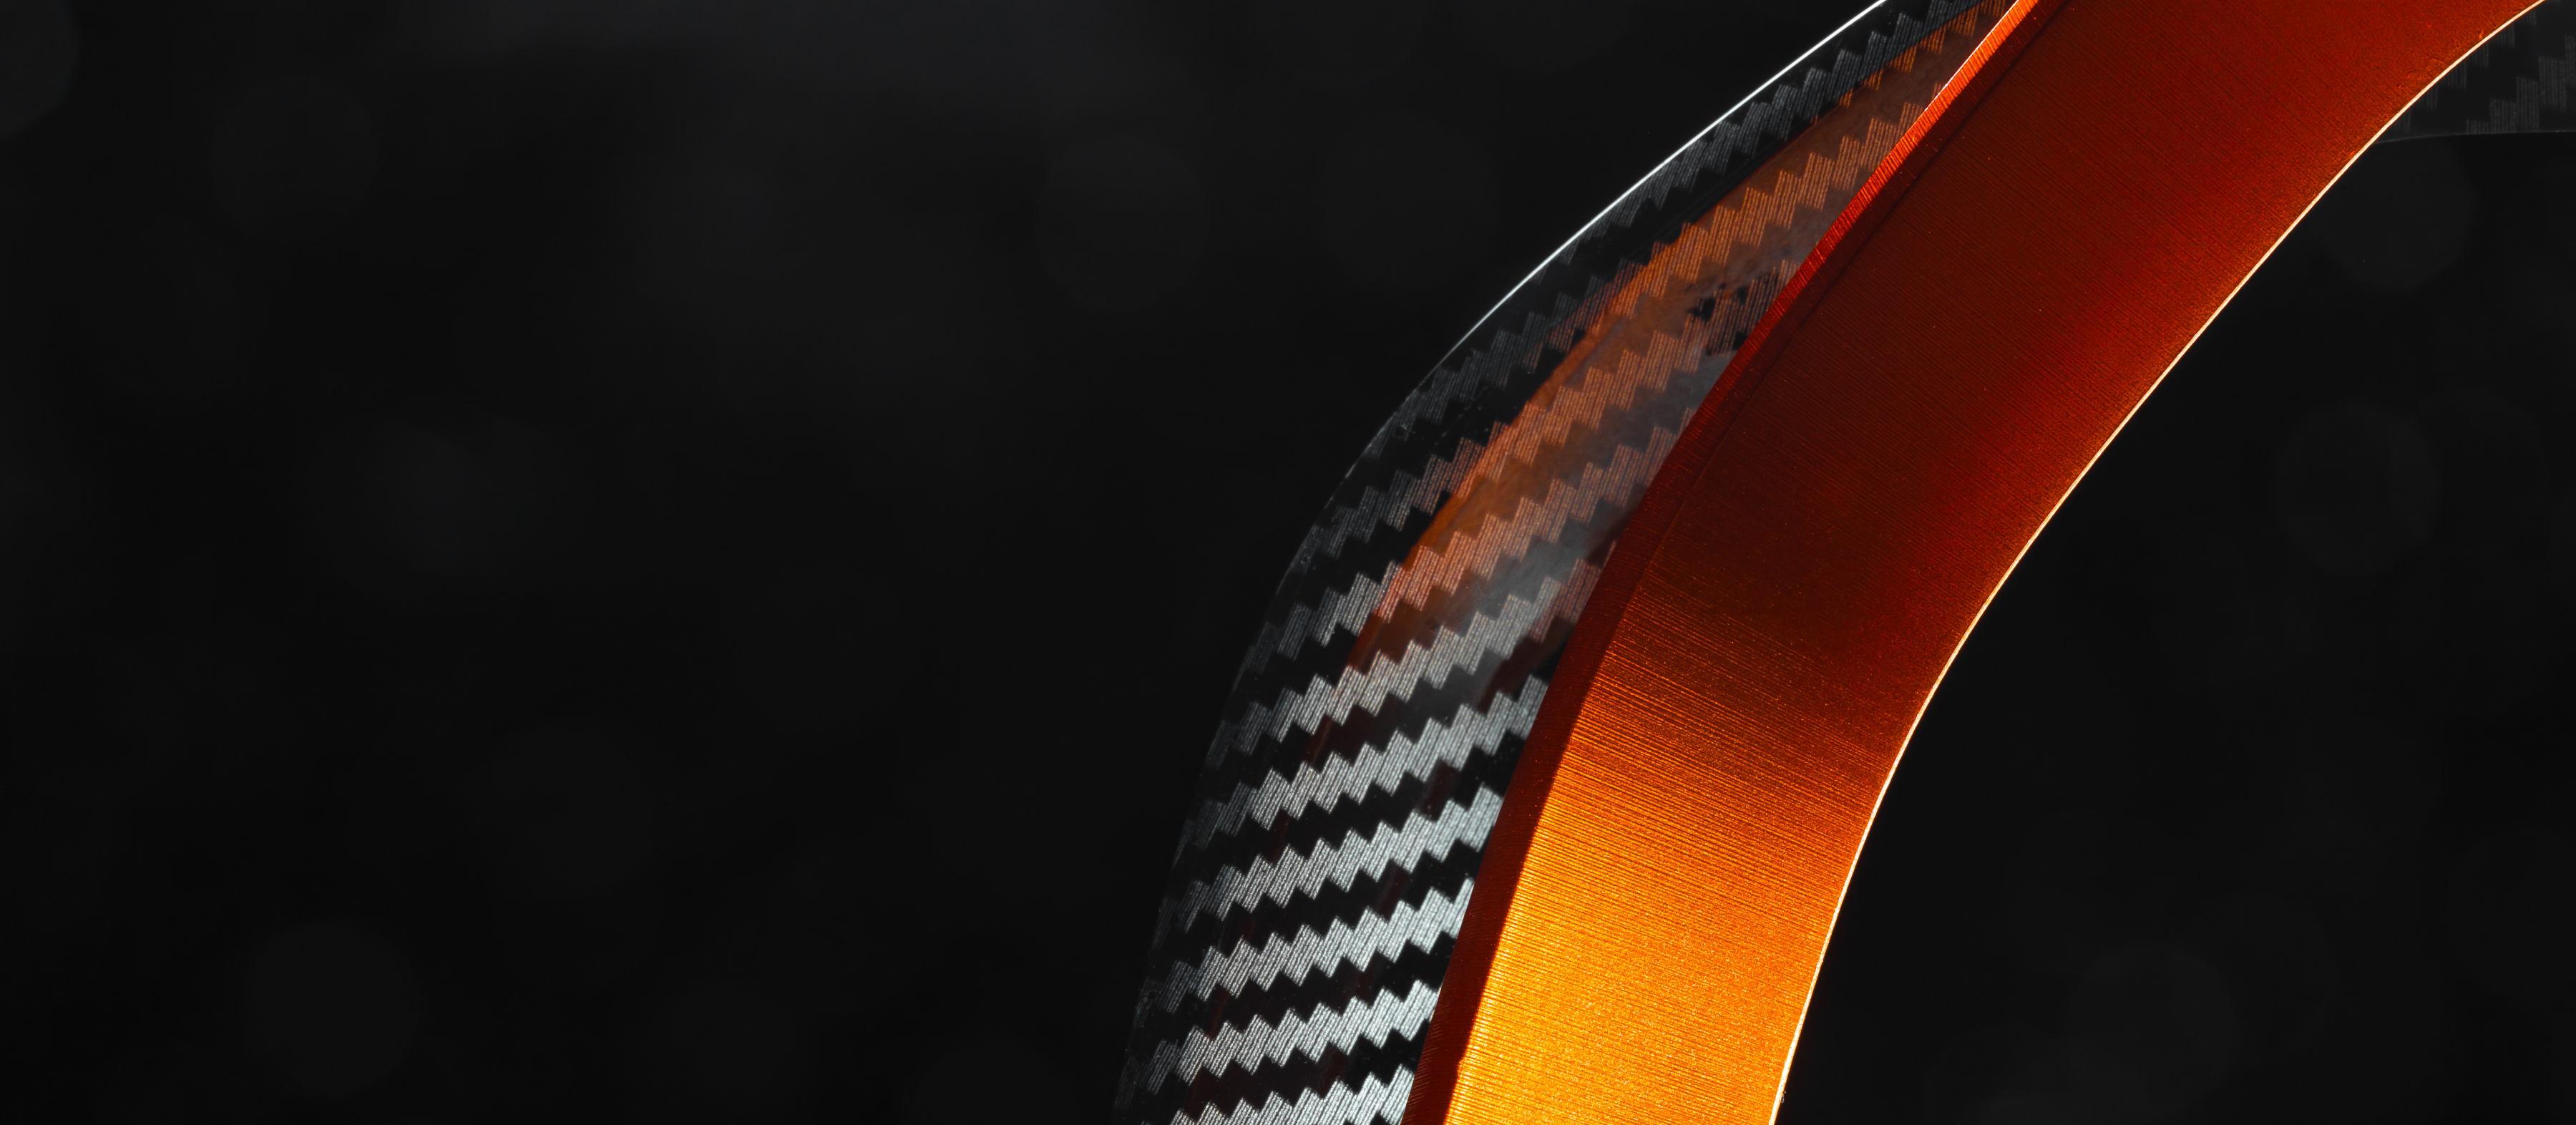
COLOUR FASCIAS:
Our signature graphite grey and STEDI™ orange fascias are included in the box and have become a staple of our high-end products. Colour options include blue, green, red, pink, and carbon fibre, with many more coming your way soon.